
Insights · 3D Fashion · 3D Body
Body measurement has always played an important part in the apparel industry for pattern making and size determination. Until now, manual measurement has been the standard in fashion — but the method is limited when it comes to repeatability, accuracy, and consistency across different personnel.
Many errors and differences result from the measurer’s skill and judgement. On top of that, different postures in the person being measured, soft tissue compressed by the tape, and fatigue in both parties — a consequence of a slow, hands-on process — all affect the outcome. Sanitary concerns since COVID-19 have made close-contact measurement harder still.
In recent years, the popularity of three-dimensional body scans and 3D measurement has soared. They are now instrumental across custom-made and bespoke apparel, fitness and wellness, footwear, and virtual reality — sectors that increasingly demand pinpoint, repeatable accuracy.
3D body scans are non-contact, unaffected by subjective factors, and fully reproducible. They take seconds to complete, so there is no time for the subject to tire. Yet trust issues remain around the difference between manual and scanned results. We hear the same question often from clients: why aren’t your results the same as our tape measurements?
To be clear, 3D body scanning is not meant to replace traditional measurement. It is meant to provide a comprehensive, repeatable set of measurement tools — and to cut down the back-and-forth of customers returning for repeat fittings.
Below are two views of the 3D model measurement results from the Scanatic™ 360 Body Scanner.

Take the bust as an example. The scanner’s algorithm automatically finds the most protruding point of the chest, draws a line around it that stays horizontal to the floor, and simulates the physical behaviour of a tape measure — forming a straight line wherever the body surface curves inward.

What distinguishes the 3D method is that the measurement outline sits right against the body surface — something that is hard to reproduce with a physical tape. Because the human body is soft and elastic, it is difficult to apply a tape without pressing into muscle and skin. The horizontal outline matters just as much: in the digital world a plane parallel to the ground is trivial to find, but in reality there is no way to position a tape perfectly level by hand.
Consider how a tailor takes a bust measurement — usually alone. The tailor stands in front of the customer, wraps the tape around from the back, and tightens it slightly across the chest so it won’t slip. From that position, the tape can press into the body, which is one source of the gap between manual and 3D results.
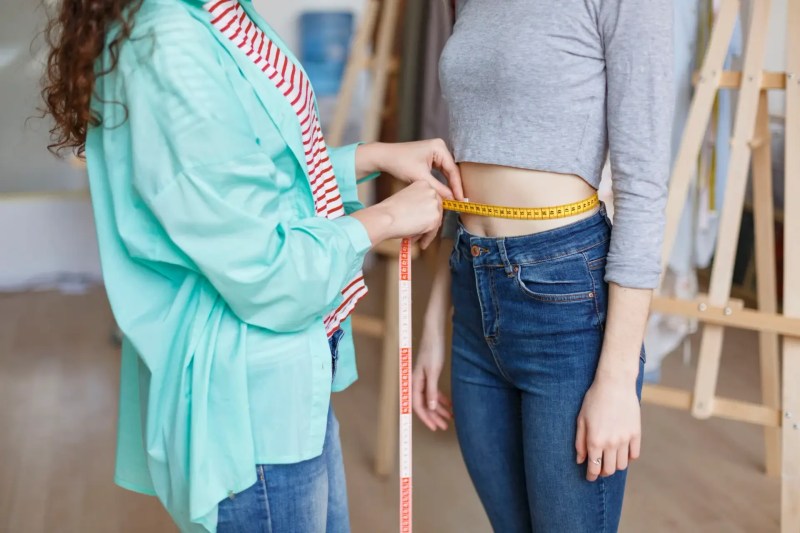
Whether measured by scan or by hand, the body is complex enough that the same person can produce different results from one reading to the next.
To verify the accuracy of a 3D scan, we strongly recommend scanning a standard dress form — which will not deform like a living body — to confirm the results and isolate the true difference between the two methods.
To make the gap concrete, we ran a controlled experiment to demonstrate the variability of the human body. The procedure:
Scenario 1 — inside the scanning room. Stickers were placed on the subject’s bust, the subject entered the scanning room, held the scanning posture, and was scanned. A manual measurement was then taken immediately in the room, first by a single measurer and then by two measurers, both trying to read the marked points without pressing into skin or muscle.


Scenario 2 — after leaving the room, posture restored. The subject stepped out, resumed the scanning posture, and the manual measurement was taken twice more.


Scenario 3 — arms in a natural pose. Finally, the subject let their arms fall naturally and the manual measurement was taken twice again.


The tables below show the difference for three subjects across all three scenarios. Each figure is the manual measurement minus the scan — so a negative number means the tape read smaller than the scanner.
| Scanned bust = 111.31 cm | Single measurer | Double measurers |
|---|---|---|
| Immediately after scanning | −4.91 cm | −0.31 cm |
| Out of room, posture restored | −2.21 cm | −0.61 cm |
| Out of room, arms natural | −3.11 cm | +0.19 cm |
| Scanned bust = 102.36 cm | Single measurer | Double measurers |
|---|---|---|
| Immediately after scanning | −1.66 cm | −0.56 cm |
| Out of room, posture restored | −1.96 cm | −1.81 cm |
| Out of room, arms natural | −2.06 cm | −1.36 cm |
| Scanned bust = 89.73 cm | Single measurer | Double measurers |
|---|---|---|
| Immediately after scanning | −4.83 cm | +0.27 cm |
| Out of room, posture restored | −4.83 cm | −1.33 cm |
| Out of room, arms natural | −5.33 cm | −0.13 cm |
A single measurer can read up to 5 cm smaller than the scan — simply because one person can’t hold the tape without pressing it into the skin.
The two-person readings land much closer to the scan. A single measurer, by contrast, can come in as much as 5 cm under. This is exactly why many clients feel our bust figures look “too big” — it is genuinely hard for one person to measure without pulling the tape into the body.
Because scanned results differ from manual ones, the most direct approach is to gather a large sample and build a conversion between the two. We measured the busts of 24 men and 23 women, once with the 3D scanner and once by tape, then compared the two sets and fit a formula.

From a formula like y = 0.1183x − 7.8163, you can convert a 3D reading into its manual equivalent, then translate that into garment or pattern-making sizes. Treat the table as a reference only, though: every tailor measures a little differently, so each shop will arrive at its own conversion.
Converting scans back into manual figures isn’t really the point of owning a scanner. Once you have manual data, you still face multiple rounds of fitting and adjustment — slow for the tailor and the customer alike. The real goal is to find a transition point directly between the scan and the finished garment.
Take our client Facha in Taiwan — one of our top partners, who has used 3D scanning to raise both product value and service quality.

Facha cut its garment modification rate from 40% to under 5% — and moved from ~15 measurement sets per session to more than 200.
Previously, time limits meant a tailor could capture only around 15 sets of measurements. With a 3D scanner, that jumped to more than 200 sets. To put the data to work, Facha ran a two-month pilot: every customer was scanned and measured by hand. They turned the accumulated scan data into pattern-making data — and brought their modification rate down from 40% to under 5%.

Facha made the most of the scanner — sharpening the customer experience while stepping into a technology-led future for tailoring.
Originally published on the TG3D Studio blog. Experimental figures are drawn from TG3D Studio’s own measurement testing; conversion formulas are provided for reference and will vary by tailor.

