Consumer behavior is changing rapidly especially with the impact of the COVID-19 situation. Research shows that over 80% of the surveyed shoppers reported that the pandemic had an impact on their shopping behavior. (Statista, 2021)
Shoppers have more time to search and browse through product details, being confined in a lock down at home. The usual in-store shopping experience has been fully moved online. The salesperson has become a chatbot. The physical products can only be shown with 2D photos. How do e-commerce brands adapt to the change? Luckily, 3D technologies can help!
TG3D Studio 3D Technologies
Why 3D? Why do I need to implement it?
Consumers are seeking a more creative, engaging, and entertaining experience when shopping which leads the brand to try different technologies, especially in extended reality. Research shows that people are increasingly drawn to virtual shopping experiences that are both informative and experiential. (TrendHunter, 2020)
Allowing your customers to shop in 3D brings several benefits to your brand. Research shows that besides sizing problem, the surface material, color difference, and unexpected details are the three major reasons why they would like to return products. (HANYUE ZHOU, 2018) With the 3D experience, shoppers can easily zoom in and out to see all the details and switch between various fabrics or style designs while browsing through the products. It also encourage the customers to engage with the user interface more so to leave a deeper impression. (HANYUE ZHOU, 2018)
You may even provide a gamify shopping experience just like Balenciaga’s Fall 2021 collection did. They showcase their collections through different non player characters (NPC) in the game and the player can see the details of the outfit by clicking that NPC. This futuristic experience took the digital trend to a new height.

Screenshot from BALENCIAGA AFTERWORLD website
We understand that not all brands have the resources to create something like Balenciaga did. So, we are providing this guide to help you get started with something simpler. To implement TG3D Studio’s 3D retail solutions, all you will need to do beforehand is to get your designs and fabric digitized and the rest of the implementation will be straightforward and intuitive.
How to implement the 3D experience?
Step 1: Create 3D fabrics for your collections

With the help of material digitizing technologies such as a 3D fabric scanner, you can turn physical fabric swatches into their digital footprints, complete with true-to-life color and texture details. The fabric can be rendered into photorealistic visual assets fabrics and then applied to your 3D garments. You could learn more about how to digitize your fabrics here: A complete guide to creating/ using digital materials for 3D fashion design
If you need our help to digitize the fabrics, we also offer a technical design service to scan the fabric collections for you. Please learn more here or contact us through the button below.
Step 2: Create 3D garments

The foundation of digital fashion starts with 3D designs so after digitizing fabrics, you will have to transform your designs into 3D. There are several options for 3D fashion design software in the market. However, if you are new to this area, we will recommend you to start with the Scanatic™ DC Suite since the garments created by DC Suite can seamlessly connect with our other 3D retail solutions such as the Scanatic™ StyleBook Service and Cloudzet Store Web Plug-in for later implementations.
If you need our help to digitize the garments, we also offer a technical design service to create your design collection into 3D assets. Please learn more here or contact us through the button below.
Step 3: Manage your digital assets in StyleBook Service
After you have your 3D garments ready, you may upload the garments into the Scanatic™ StyleBook Service. If you use our Nuno Fabric Scanner when digitizing fabrics, all the fabrics that you have scanned will be accessible through the StyleBook Service automatically. If not, you will need to manually upload all the fabrics. Learn more about how to create fabrics from the Scanatic™ DC Suite and upload them into the StyleBook Service here.
Step 4: Choose your customization options
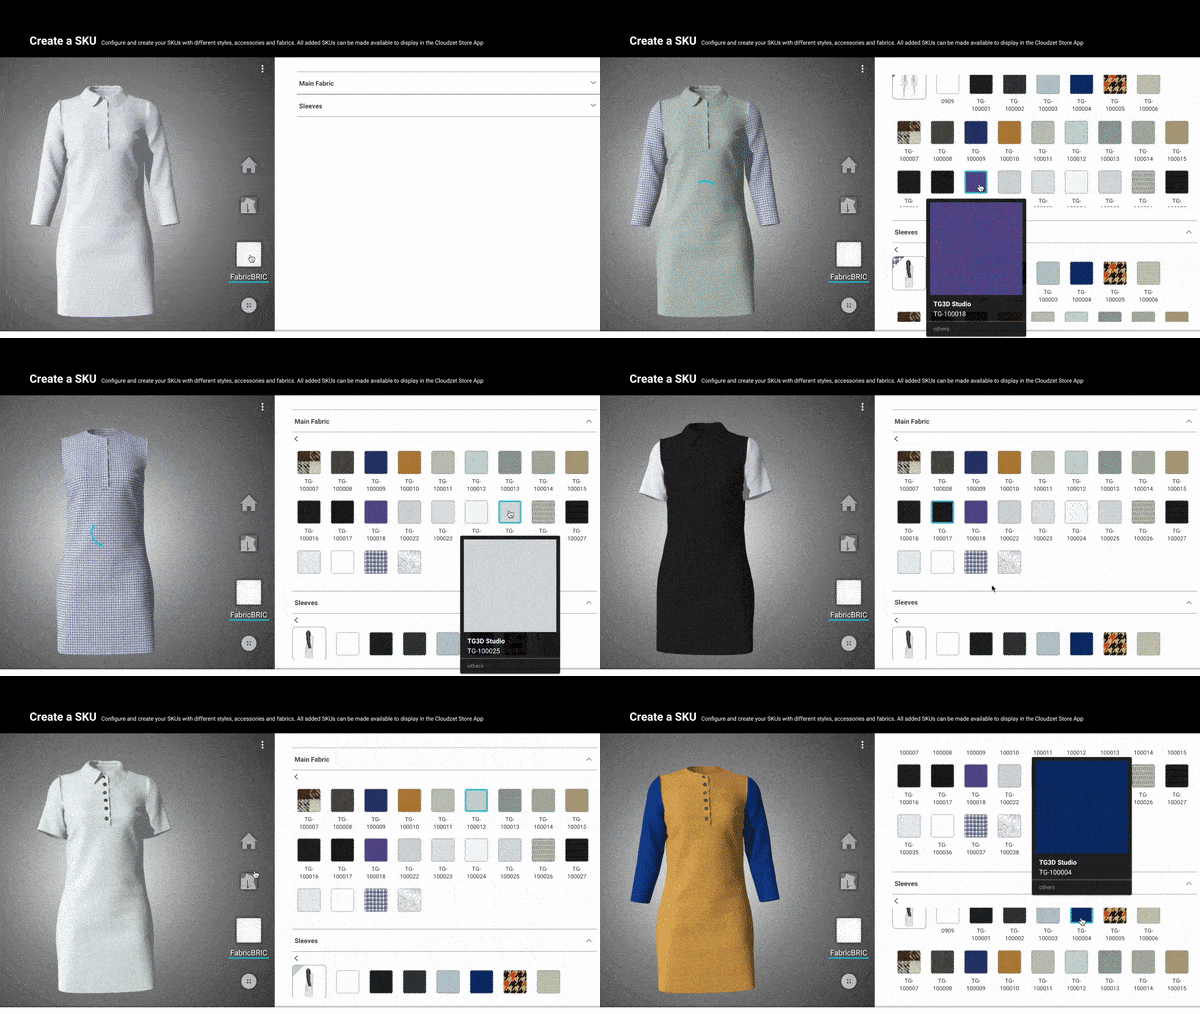
You will see the 3D garments becoming blank templates in Scanatic™ StyleBook Service after your upload. Then you could assign fabrics or trims options to the blank templates to create rules for your 3D customization experiences.
For ready to wear brands, the process will be even easier. You will just need to mix and match different fabrics and trims to create as many SKUs as you want. Then you will be able to integrate those SKUs in the next step.
Step 5: Embed the code to your website or use our Shopify integration service
After creating the digital assets with or without customization options, you may utilize our StyleBook Service built-in integration tool to either embed just the customization experience onto your website or connect to Shopify Shop and fulfill the experience with online orders.
If you have web developer resources and would like to create a more sophisticated e-commerce website with our 3D customization experience, we also provide APIs with web plug-in solutions for you to apply the 3D experience with your branding, ordering system, or CRM system.


